summer romance
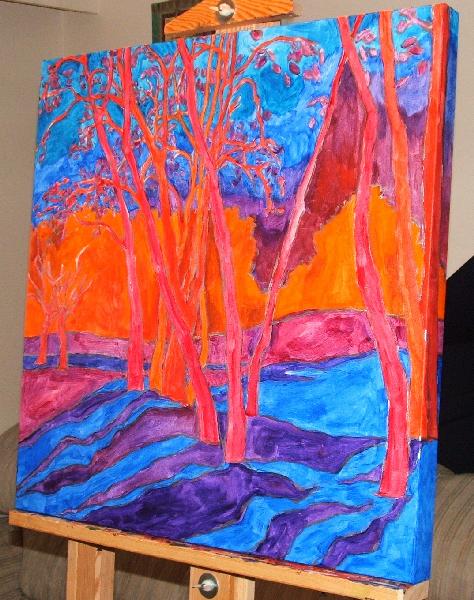
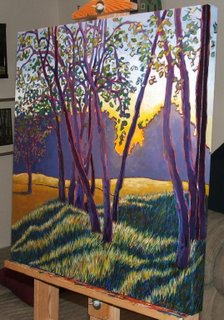
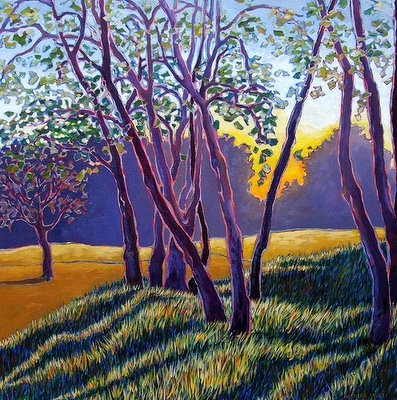 It's fun to post works in progress, so I thought I'd do this one as it's my last landscape for awhile. Since it was a commission I wanted to documents its progress for its new owner. I won't explain the steps but you'll see trees appear and disappear and other ghost-like happenings. I paint by trial-and-error a lot, and though the very first stages of the painting may look like giant, blatant, undeniable error, there's actually method to my madness.
It's called Summer Romance (at the end of February I was getting very tired of winter scenes) and is 24" x 24".


posted by andrea at 12:22 p.m.
![]()
![]()
24 Comments:
Wow. I just saw this on flickr and was immediately in love. THe colors are amazing, like something out of a dream.
Holy smokes, Andrea...that is really sweet. I'm sure your buyer will be pleased.
Gasp! You have captured "the beauty light"! The person who gets this is lucky...it will transport him or her everytime (s)he gazes at it!
Andrea, if I hadn't seen the wonderful finished product, I would also have like picture #3 very much!
Awww, nicely done andrea! Beautiful as usual.
a.
Oh, so incredible to see your process! I love the dazzling golden sunlight in the finale.
I am very grateful for positive input right now, so thank you all very much. Sorry I've been so bad about responding to comments lately (s**t happens, sometimes in spades) but I certainly appreciate the encouragement. THANK YOU!
Love this sequence - so many of the stages look like finished pictures to me (with very different effects of course) you really do paint your pictures over and over.... and the final looks well worth it. Lucky commissioner!
Gorgeous!
I am disappointed that this might be the last one for a while. You have a unique and talented style.
That was a fascinating walk through your process - thank you so much!!
I was just about to get off the computer when i decided to check your blog.
WOW! I am in awe. Seeing the process is fasinating. the part that intrigues me the most is the grass because i would have thought in the beginning where you have the darker purple area would have ended up being the shaded parts and they turned out to be the light on the ground.
Awesome, awesome work
Brilliant colors
Really interesting piece.Love the bold and vibrant colors ! You should most definitely post more pics of each "stage".
I love to see step-by-steps. Thanks for showing all the phases. The colors of your underpainting are so glorious and bold, and the finished painting is gorgeous. First time I've seen your site, it's really nice!
what a wonderful progression! you can't help loving it!
It's so beautiful.
Many thanks for the progression. I have thought about picking up the paintbrush again, maybe a little fearful. Your colors are so pretty. Like Shari I would love to see more stages of your works. So beautiful!
Thank your for sharing the progress of this beautiful piece. I'm curious, why do you use, for example, the large block of orange, that ends up as the purplish trees?
Fabulous colours, Andrea. The finished painting reminds me of works by Gaugain and Rousseau.
Jaimie: I find that painting on a colour rather than white gives a slightly richer/opaque (though not brighter) quality to the painted surface. In some cases I let a lot of the underpainting show through, like in grassy or leafy areas. I try and choose darkish and/or complememtary colours for the underpainting to add more punch. In some cases, like the 'wall' of purple trees, the underpainting is only visible around the edges of the area.
WOW! I love this! This is great! Wonderful to see the progression and steps! Mary :-)
I can't say anything but awwwwwwww! :o)
awesome paintings .. so they are the same paintings with different colors right? niceeee .. great work
Wow- thanks for posting your process- it's really amazing to see your work from start to finish!
Post a Comment
<< Home